目录
禁止转载,侵权必究!Update 2020.10.5
前言
上一章我们学习了PaddleDetection工具快速训练模型的技巧。本节我们将要把训练好的模型做成一个flutter插件并测试。
编译PaddleLite(可选)
PaddleLite是什么?它提供了运行模型所需要的操作系统驱动程序和编程语言支持。比如本教程中PaddleLite为我们提供了Android动态链接库和基础jar包。
按官网指导准备mac上的PaddleLite源码编译环境。然后交差编译Android版动态链接库和jar包(亲测PaddleLite预编译库报错)。
注意:PaddleLite版本号(本教程源码版本号:Release v2.6)。飞桨的版本更新很快,如果用预编译库不报错,请优先用预编译库。
创建插件项目
为什么要创建插件项目而不是普通的flutter项目呢?
从软件工程角度看,AI只是应用系统的一部分。因此把AI能力做成插件就可以赋能给其他的上层Flutter App。Flutter开发者可以像调用相机插件、文件插件一样使用我们的AI插件。
命令行创建项目:
flutter create --org cn.abilitygame -t plugin -i objc -a java --platforms android,ios ability_cola_detection_plugin1编译example目录下的apk:
cd ability_cola_detection_plugin1/example
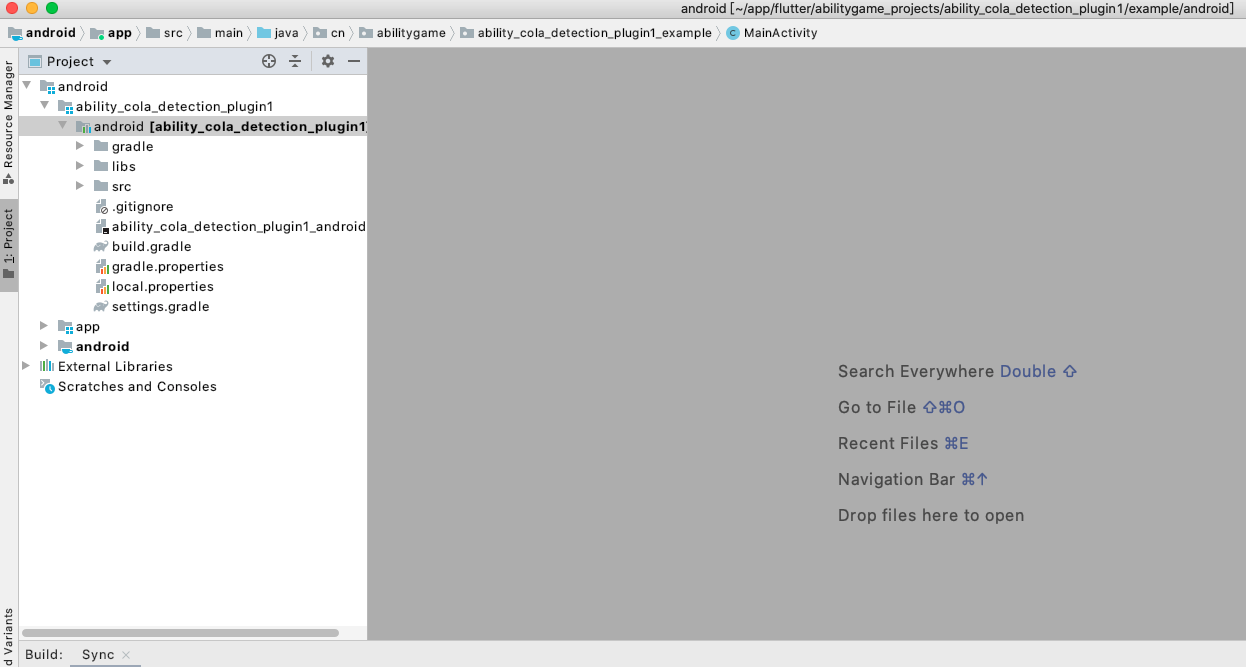
flutter build apk --target-platform android-arm,android-arm64 --split-per-abi用Android Studio打开ability_cola_detection_plugin1/example/android目录,并切换到Project面板,如图:
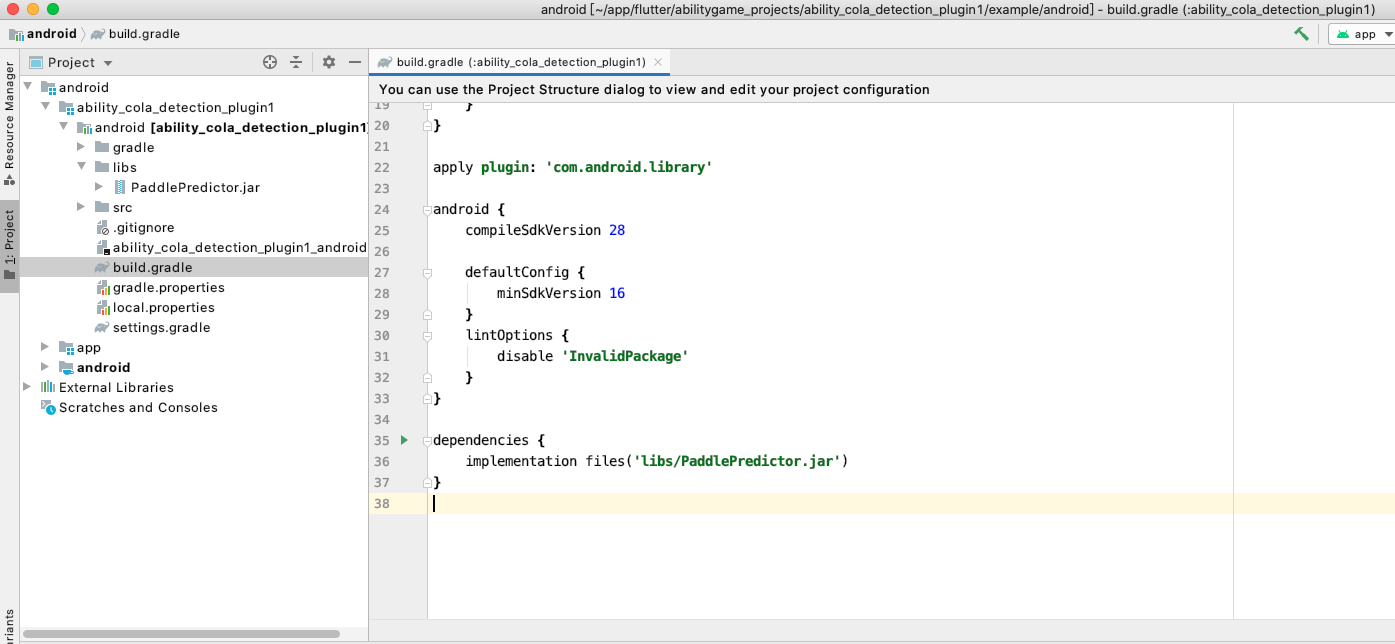
在android目录下创建libs目录,并拷贝PaddlePredictor.jar包(从预编译库或者PaddleLite源代码交差编译后的build目录找)到这个目录。右键Add As Library会在build.gradle中自动创建依赖项,如图
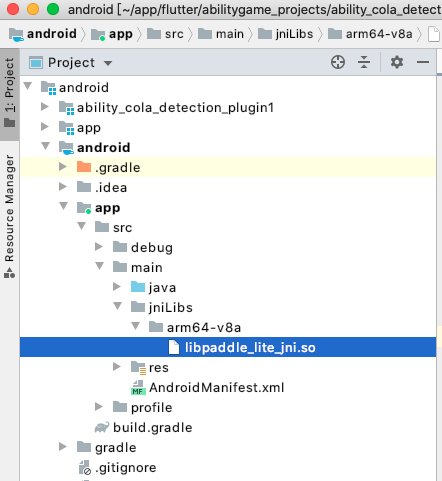
在src/main下面创建jniLibs目录(以及手机支持芯片的子目录arm64-v8a),放入PaddleLite的动态链接库libpaddle_lite_jni.so:
加载模型
从百度AI Studio中下载训练好的模型文件cola_opt.nb和label文件cola_label.txt放入项目如图位置,并定义三个method call方法:
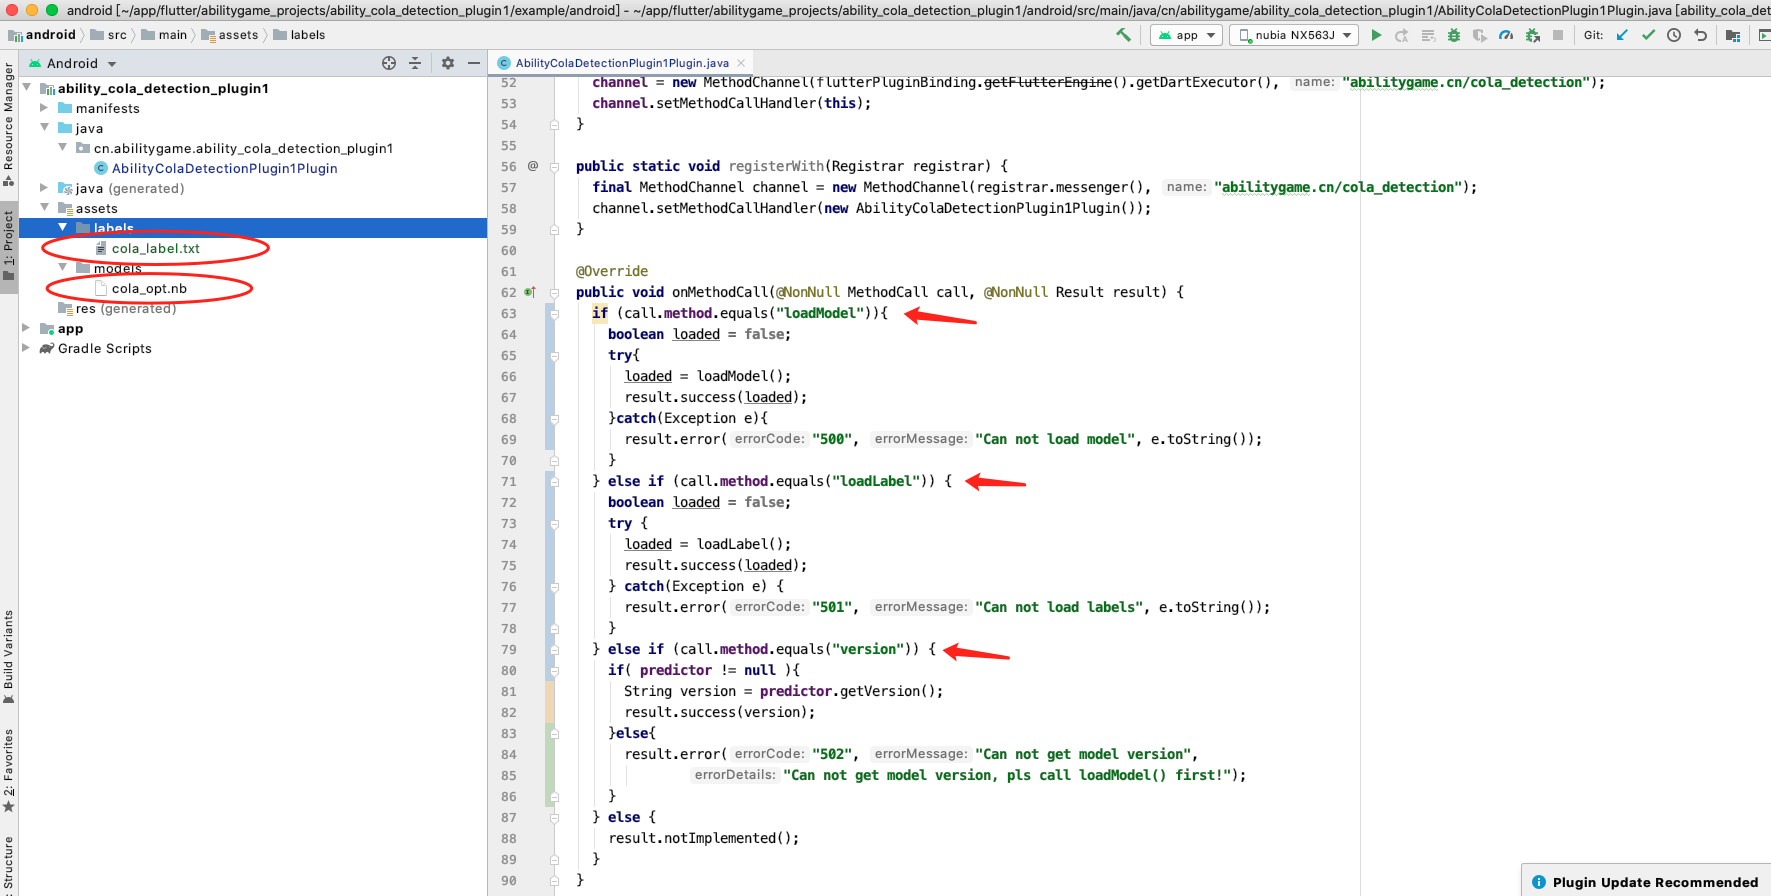
定义loadModel方法实现(获得predictor):
  private boolean loadModel(){
    String cachedModelPath = copyFromAssetsToCache(modePath, modelFile);
    MobileConfig config = new MobileConfig();
    config.setModelFromFile(cachedModelPath + "/" + modelFile);
    config.setPowerMode(PowerMode.LITE_POWER_HIGH);
    config.setThreads(1);
    predictor = PaddlePredictor.createPaddlePredictor(config);
    return true;
  }
定义loadLabel方法实现(获得wordLabels):
  private boolean loadLabel(){
    wordLabels.clear();
    try{
      BufferedReader br = new BufferedReader(new InputStreamReader( context.getAssets().open( labelPath + "/" + labelFile)));
      String line = null;
      while( (line = br.readLine()) != null ) {
        wordLabels.add(line);
      }
      Log.i(TAG, "label size:" + wordLabels.size());
      return true;
    }catch( Exception e ){
      Log.e(TAG, e.getMessage());
    }
    return false;
  }
定义Android本地代码和Flutter代码交互的channel名:
  @Override
  public void onAttachedToEngine(@NonNull FlutterPluginBinding flutterPluginBinding) {
    context = flutterPluginBinding.getApplicationContext();
    channel = new MethodChannel(flutterPluginBinding.getFlutterEngine().getDartExecutor(), "abilitygame.cn/cola_detection");
    channel.setMethodCallHandler(this);
  }
编写Flutter代码
关闭项目,重新打开Android Studio,选择Open an exist Android Studio Project。
注意:打开根目录,不是example目录
定义Flutter和本地代码交互的dart类AbilityColaDetectionPlugin1:
// 提供version方法给UI层
class AbilityColaDetectionPlugin1 {
static const MethodChannel _channel =
const MethodChannel('abilitygame.cn/cola_detection');
static Future<String> get version async {
final bool loadModelFlag = await _channel.invokeMethod("loadModel");
final bool loadLabelFlag = await _channel.invokeMethod("loadLabel");
final String version = await _channel.invokeMethod('version');
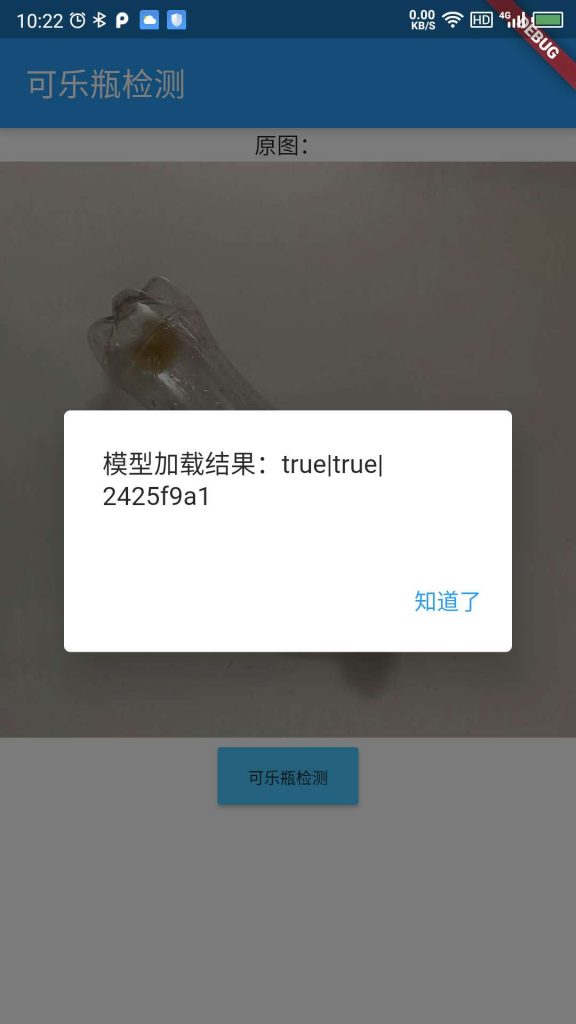
return loadModelFlag.toString() + "|" + loadLabelFlag.toString() + "|" + version;
}
}打开example/lib/main.dart定义flutter的UI类:
// 显示App界面
  @override
  Widget build(BuildContext context) {
    return MaterialApp(
      home: Scaffold(
        appBar: AppBar(
          title: const Text('目标检测'),
        ),
        body: Column(
          children: <Widget>[
            Text('loadModel | loadLabel | Paddle-Lite版本号: $_aiModelInfo\n'),
            RaisedButton(
              onPressed: () => print("start detect"),
              color: Colors.lightBlueAccent,
              child: Text('开始测试', style: TextStyle(fontSize: 10)),
            ),
            Text('原图:'),
            Image.asset("images/11649.jpg"),
            RaisedButton(
              onPressed: () => print("view detect picture"),
              color: Colors.lightBlueAccent,
              child: Text('查看结果', style: TextStyle(fontSize: 10)),
            )
          ],

        ),
      ),
    );
  }
定义私有方法:
// 调用插件的version方法,放入私有变量_aiModeInfo
Future<void> initPlatformState() async {
    String aiModelInfo;
    // Platform messages may fail, so we use a try/catch PlatformException.
    try {
      aiModelInfo = await AbilityColaDetectionPlugin1.version;
    } on PlatformException {
      aiModelInfo = 'Failed to get platform version.';
    }

    // If the widget was removed from the tree while the asynchronous platform
    // message was in flight, we want to discard the reply rather than calling
    // setState to update our non-existent appearance.
    if (!mounted) return;

    setState(() {
      _aiModelInfo = aiModelInfo;
    });
  }
编写测试用例
Flutter插件项目中有一个example目录,可以在里面写测试用例,这样用插件的使用者就可以清晰知道插件能力。
从AIStudio中的test目录中找一张测试集的图片
./JPEGImages/11649.jpg ./Annotations/11649.xml然后去JPEGImages找到图片并下载下来。在example目录下创建images目录,并将图片放入此目录作为测试用例。编辑pubspec.yaml文件增加以下配置:
  assets:
    - images/11649.jpg
把assets中的图片byte数组传给android:
// Android接收端代码片段
} else if (call.method.equals("detectCola")) {
      if( call.arguments instanceof byte[] ){
        byte[] imageBytes = (byte[])call.arguments;
        Log.i(TAG, "receive image byte[] from flutter, size:" + imageBytes.length);
      }else{
        Log.e(TAG, "imageBytes transfer error from flutter to android native!");
      }
    }
// Flutter发送端代码片段
static Future<void> get detectCola async {
ByteData testImage = await rootBundle.load('images/11649.jpg');
Uint8List imageBytes = testImage.buffer.asUint8List();
final String imageFile = await _channel.invokeMethod("detectCola", imageBytes);
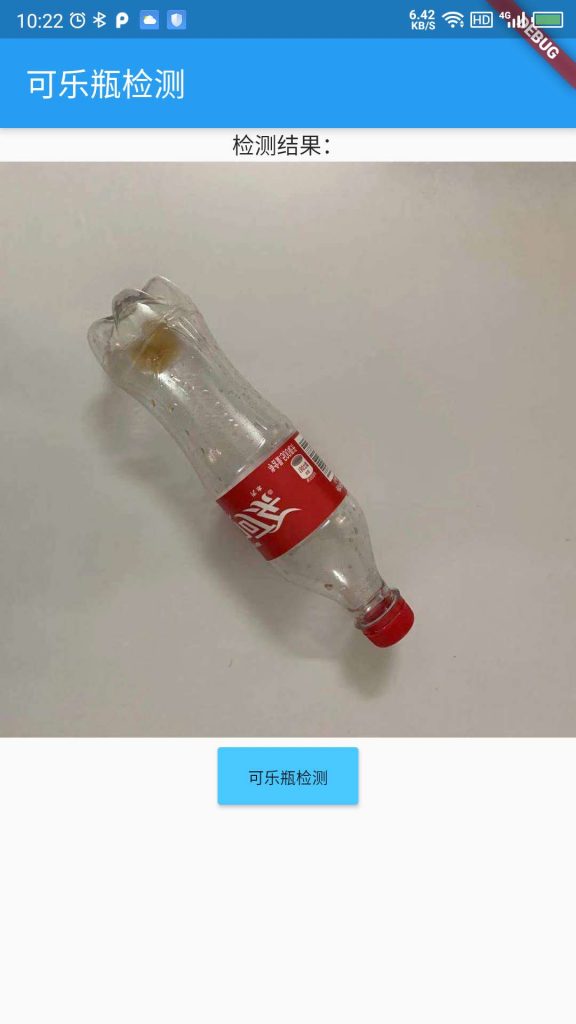
}调用detectCola方法结果:
可以看到44,362个字节已经从MethodChannel中传递给Android底层了。

注意:传递图片数据用到了UintList (Flutter) –> byte[] (Java)转换。请参考数据结构映射表
真机调试
点击“可乐瓶检测”按钮,可以在后台日志中看到检测结果。